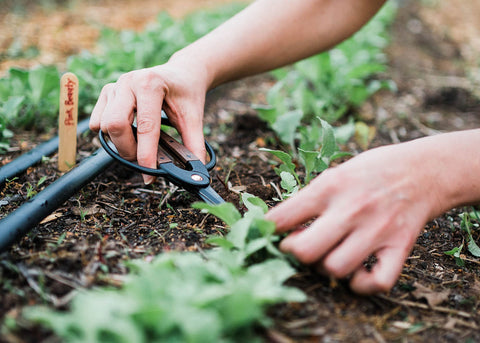
Direct sowing, or direct seeding, is the sowing of seeds (vegetable, flower, herb) directly into the garden soil at the start of the growing season. Just as many varieties benefit from a head start inside your home and transplanted outdoors as small plants, other seeds should be sown directly in your garden soil for the best growing results. The back of our seed packets will guide you to the recommended method for each variety including when to sow as relating to the frost date, seed depth, plant spacing, optimal soil temperature, days to maturity and more.
- Direct Sowing Benefits -
The plants root system is not disturbed and does not become rootbound. When starting seeds indoors, the stems and leaves grow very quickly, and their roots grow even faster. If your plants were not potted up inside, or they remained in their container for to long, they can become rootbound which increases the risk of transplant shock.
Less resources and time are needed compared to indoor seed starting. Direct sowing is a much more simplified approach to growing your own food. You won't need a heat mat, growing cells & containers, seed starting soil such as coconut coir, grow lights and a seedling rack/shelf. You'll just need some good soil, water, light & seeds!
- The Best Soil Conditions for Sowing -
Soil temperature and moisture are super important for a quick and vigorous germination for the strongest seedlings. Seeds sown in soil that is to wet or cool may rot and germinate poorly. Identify your plant hardiness zone to get an approximate planting date to avoid spring and fall frosts that can damage your plants.
Soil Temperatures for Germination
Check the soil temperature with soil probe thermometer prior to sowing for the best germination success. Take readings 1-2 inches into the soil to best monitor your daily soil temperature. If the soil is too warm, or to cold, fewer seeds germinate and they may take longer to do so. A plant can experience stress if it is subjected to a long germination process. It won't grow as fast and won't be able to cope with the stresses like insects, temperature fluctuations and moisture. For most seed types, 55-65˚ is a common range for germination, while there are the varieties that require warmer or cooler temps.

Refer to the back of your seed packet for specific growing instruction for each seed type.

Optimal Soil Moisture
Your soil's moisture level must be correct for the best seed germination. You can monitor this with two different tools; your hands or a soil moisture meter. The easiest and least expensive method is to use the two hands God gave you.
Gather a handful of soil from your garden and squeeze it.
Soil is too wet if you squeeze out water or it compresses into a ball and stays that when when you loosen your grip.
Soil is too dry if it does not compress and just flows out of your hand like powder.
Soil with the correct moisture should compress and hold together but break apart when worked gently with your fingers

- Sowing Seeds in Their Proper Place -

As a general rule, the smaller the seed, the closer to the surface the seed should be sown. Most small-seeded types can be sown 1/8-1/4" deep and larger seeds can be sown 1/2-1" deep. Follow planting instructions on your seed packet for recommended depth. After sowing, most seeds should be covered with loose soil to help keep the seeds moist and provide the darkness they need for germination. Some seeds require light to germinate such as lettuce and many herb seeds. These seeds should be sown on the surface and lightly tamped in and covered minimally with soil.
Watering needs. After sowing, water the seed bed gently, evenly and thoroughly to ensure good seed to soil contact and to avoid displacing your seeds. The embryonic plants are delicate and require consistent moisture to complete the earliest life stages. A dry period can easily kill them or stunt their growth.
- Caring For Your Seedlings Post Germination -
Weeding, mulching, watering and fertilizing will work hand in hand to give your garden crops all that they need for success.
Weeding : Weeds are simply plants growing too closely to where you don't want them to grow. These unwanted plants compete for nutrients, water, space and sunlight. Weed regularly to avoid weeds in your garden from getting out of control. There are many different methods and tools used for weeding from various hand tools, to colinear hoes and flame weeders.
Mulching : After your seedlings are established, a layer of mulch can be added to reduce weed pressure and help to conserve moisture. Organic mulches such as grass clippings, leaves, wood chips and straw can also provide food for soil-dwelling organisms. Plastic mulch can be a great option to control weed pressure when applied prior to sowing.
Watering : Water as often, and deeply, as necessary to prevent your soil from drying out. Each plant variety will have slightly different needs depending on the depth of their root system. For example, some plants, such as onions, grow all of their roots fairly close to the soil surface. While others, such as beets and carrots, have a wide and deep roots system. Overhead watering, watering wands, water cans and drip irrigation systems are all great options that can be used in your vegetable garden.
Fertilizing : If your plants are green and look healthy there is usually not a need to fertilize. Plants grow their best if their growth is steady and uninterrupted. Growth slows down if the soil is dry and speeds up when it's moist. If the soil becomes too hot or too cold, growth slows, then speeds up when optimum soil temperature is reached. If you fertilize unnecessarily during the growing season, you are encouraging fluctuations in growth. An acceleration when fertilizer is applied, a decrease when it used up, and acceleration when additional fertilizer is applied.
Unfortunately, if you are starting a new garden, your soil might not yet provide all the nutrients your plants will require. If needed, apply a soluble fertilizer, such as liquid seaweed or fish emulsion, about 4-6 weeks post-germination. When in doubt, fertilize. Small fluctuations in your plants growth are not as detrimental as abrupt stops in growth.


God bless your company, I know I don’t trust this POISONOUS food nowadays! I LOVE that you kept the food as it was planned by GOD PLEASE DON’T SELL to... Show more
I discovered your site on YouTube and certainly glad I did! I have been reading your history and I’m quite impressed. Your down to earth philosophy on all God’s abundance... Show more
Is there a best soil to use? In the past I’ve used a mixture of 3 different things but I can’t remember what they are!