Starting your own seeds indoors—whether it’s heirloom tomatoes, medicinal herbs, or flowers for the table—is one of the most satisfying parts of growing your own food. It gives you a jump on the season, saves you money, and opens the door to seed varieties you’ll never find at the local big box store.
It’s how we started—on a folding table under a shop light in the basement—and it’s still the method we trust today. Whether you’re growing for flavor, health, beauty, or self-reliance, starting seeds indoors gives you control from the very beginning.
Here’s how to do it right.
What to Start Indoors (and Why)
Some crops just need a head start. If you’re planning to grow any of the following, they’ll benefit from 6–8 weeks indoors before heading into the garden:
- Tomatoes
- Peppers
- Eggplant
- Broccoli
- Onions
- Celery
- Cabbage
- Cauliflower
- Melons (depending on your zone)
If you're not sure when to start, it all comes down to your average last frost date. You can find that (and your USDA hardiness zone) with a quick online search. Here in Chester County, PA, we aim to start most warm-weather crops in late February to mid-March.
What You’ll Need

You don’t need fancy gear to grow strong seedlings—just the right setup and a little care.
- Quality seed-starting mix: Use a fine, lightweight mix made for starting seeds—not heavy garden soil. It should hold moisture but still drain well.
- Containers with drainage: Plug flats, CowPots, or even reused yogurt cups can work. Just make sure excess water can escape.
- Bottom heat: A simple heat mat will boost germination for heat-lovers like tomatoes, peppers, and eggplant. Aim for 70–85°F soil temps to get things moving.
- Light (and lots of it): Once seeds sprout, they need 12–18 hours of light each day. A full-spectrum LED grow light hung a few inches above your seedlings does the trick. Weak lighting leads to weak stems—keep ’em close.
- Watering system: Bottom watering is best. Fill the tray beneath your pots with water and let it wick upward. It keeps foliage dry and reduces disease.
- Humidity dome (optional): Great for keeping things moist and warm during germination. Once your seedlings pop up, remove the dome to allow airflow.
- Labels: You’ll thank yourself later. Trust us.
- Organic fertilizer: After the first true leaves appear, feed weekly with a gentle liquid fertilizer—fish emulsion works well. Go half strength to start.
Step-by-Step: Starting Seeds Indoors
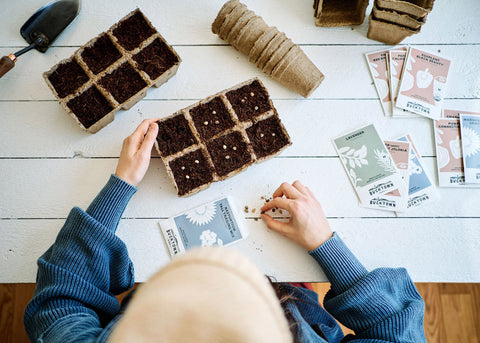
- Moisten your seed-starting mix and fill your containers.
- Press the mix down lightly to eliminate air pockets.
- Sow 2–4 seeds per cell, then cover lightly with mix.
- Label each variety.
- Mist the surface or water from the bottom.
- Place trays on a heat mat and cover with a humidity dome.
- Once seeds germinate, remove the dome and move them under lights.
- When seedlings have true leaves, begin weekly feeding.
- Pot up into larger containers as needed.
- Harden off before transplanting—gradually introduce them to outdoor conditions over 5–7 days.

A Few Parting Tips
- Don’t overwater. Seeds need moisture, not a swamp.
- Start small. Focus on a few varieties you’re excited about.
- Keep a notebook. Jot down your timing, what worked, what didn’t.
Growing from seed isn’t just about saving money or getting ahead of the season—it’s about reconnecting with something real. It’s the confidence that comes from knowing exactly how your food began. Whether you’re filling backyard beds or starting herbs on the windowsill, it all begins the same way—with good seed and the will to grow it. That’s how we started, and it’s still what drives us: clean food, strong roots, and the joy of growing what you eat.
Ready for the next step? We’ve rounded up the tools that make seed starting simple and satisfying—from wooden labels to heat mats and compostable pots. Head to our supplies page for the basics every home gardener needs.


Your tips on starting a veggie garden was easy to follow and very informative
Thank you for the tips! I have always had plants but this is my first attempted ‘garden’.